

Heavy-Duty Suspension Upgrades for Overlanding Trailers: Stop the Porpoising, Start the Comfort
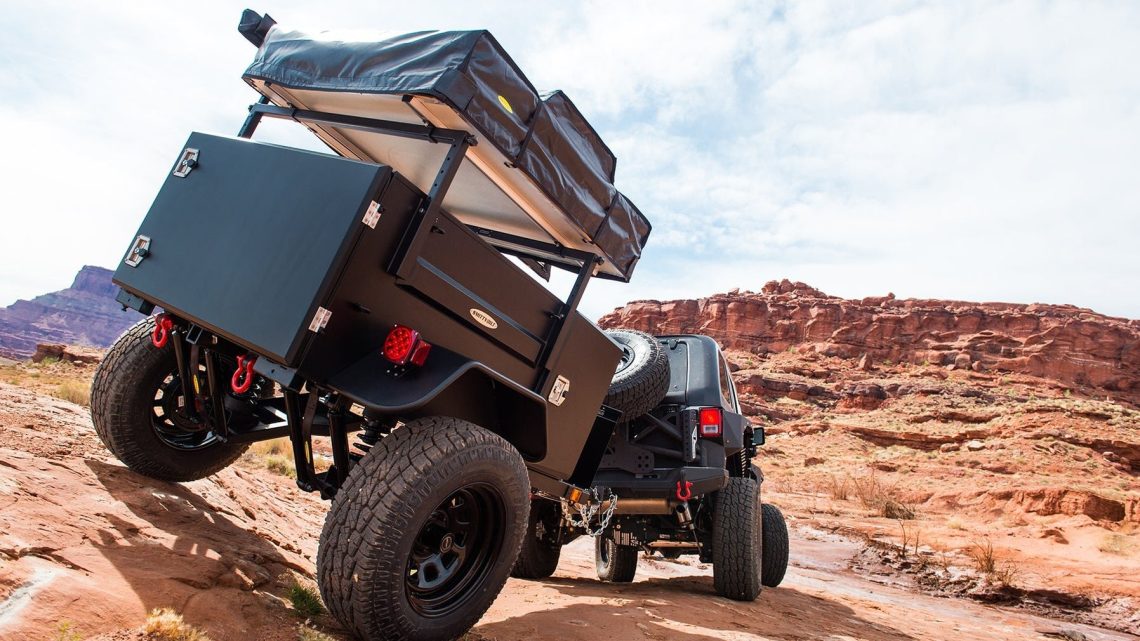
September 7, 2026Let’s be honest—towing a trailer off-road is a different beast. You’ve got the rig dialed in, the tires aired down, and the recovery boards strapped on. But behind you, that 2,500-pound box of gear is bouncing like a hyperactive kangaroo on a pogo stick. If you’ve ever watched your trailer’s wheels leave the ground on a washboard road, you know the feeling. It’s not just uncomfortable; it’s dangerous. That’s where heavy-duty suspension upgrades come into play. And no, this isn’t just about slapping on bigger shocks. It’s about engineering a system that works with your vehicle, not against it.
Why Stock Suspension Fails on the Trail
Most factory trailer suspensions are designed for one thing: smooth highways. Leaf springs are cheap, simple, and fine for a trip to the dump. But they’re not built for the constant articulation, shock loads, and sheer weight distribution that overlanding demands. The stock setup usually has a few key weaknesses.
First, there’s the matter of spring rate. A standard 2,000-pound axle with 1,750-pound leaf springs might handle a loaded trailer okay on pavement. But hit a rut at 25 mph, and the spring compresses fully, bottoming out the axle. That jolt transfers straight to your tow vehicle’s hitch, then to your spine. Second, shock absorbers—if they exist at all—are often nothing more than friction dampers. They’re useless after the first 10,000 miles of dust and grit.
And then there’s the geometry. Most trailers have a fixed axle with zero camber adjustment. That’s fine for straight-line towing, but off-camber trails cause uneven tire wear and unpredictable sway. Honestly, the stock setup is a compromise. And compromises don’t survive Moab.
Key Components of a Heavy-Duty Upgrade
Before you start buying shiny parts, let’s break down the core areas you’ll be upgrading. Think of this as the anatomy of a proper off-road trailer suspension. It’s not just about one piece—it’s the whole system working in harmony.
1. Leaf Springs: The Backbone
Upgrading your leaf springs is step one. Look for military-wrap or double-eye springs with a higher load rating than your trailer’s GVWR. For example, if your trailer weighs 3,000 pounds loaded, get springs rated for 3,500 pounds. That extra capacity prevents sagging and gives you a bit of headroom for unexpected weight. But here’s the trick—don’t go too stiff. A spring that’s too rigid will skip across bumps instead of absorbing them. You want a progressive rate, where the spring is compliant initially but firms up under load.
Also, consider adding spring slippers or Teflon pads between the leaves. This reduces inter-leaf friction, which is a silent killer of ride quality. It’s a cheap upgrade that makes a noticeable difference.
2. Shocks: The Dampers That Matter
Here’s the deal—most trailers don’t come with shocks from the factory. If yours does, they’re probably inadequate. Adding proper shocks is the single biggest improvement you can make. You want remote-reservoir shocks with adjustable damping. Why? Because they dissipate heat better and allow you to tune the ride for different terrains. Soft for rocky trails, firm for high-speed dirt roads.
Look for brands like Fox, King, or Bilstein that offer trailer-specific models. And make sure the shock mounts are reinforced. A shock that’s mounted to a flimsy bracket is worse than no shock at all—it just flexes and does nothing.
3. Axle and Hub Upgrades
Your axle is the unsung hero. If you’re running a 3,500-pound axle, that’s a good start. But heavy-duty means going to a 5,200-pound axle with heavier spindles and bearings. This isn’t about payload—it’s about durability. The larger bearings handle lateral loads better, and the thicker axle tube resists bending. Also, consider upgrading to a Torsion axle if you’re building from scratch. Torsion axles have independent wheel movement and built-in damping. They’re pricier, but they eliminate the need for separate shocks and springs. That said, they’re harder to repair in the field. Weigh your options.
4. Articulation and Pivots
If you’re tackling serious rock gardens, you need articulation. That’s where trailing arms or radius rods come in. These allow the axle to move up and down without twisting the frame. A simple setup uses two trailing arms per side, with polyurethane bushings at the pivot points. These bushings are key—they need to be tough enough to handle dirt and water but compliant enough to allow smooth motion. Avoid cheap rubber bushings; they’ll crack within a season.
Air Suspension vs. Leaf Springs: The Great Debate
There’s a growing trend toward airbag suspension on trailers. And sure, it’s tempting. You can adjust ride height from inside the cab with a wireless controller. But here’s the catch—airbags are fragile. A stray rock or a sharp branch can puncture an air sleeve, leaving you stranded. And when they fail, they fail completely. Leaf springs, on the other hand, might squeak and groan, but they rarely snap without warning. For remote overlanding, reliability trumps adjustability. My take? Stick with a well-tuned leaf spring setup. If you want adjustability, add helper airbags that sit inside the springs—they give you lift when you need it but don’t compromise the primary system.
Now, About That Porpoising…
You know the motion—the rhythmic bouncing that gets worse at 30 mph on a gravel road. That’s called porpoising, and it’s caused by a mismatch between the trailer’s natural frequency and the tow vehicle’s. Heavy-duty shocks help, but the real fix is a properly tuned weight distribution hitch combined with your upgraded suspension. The hitch should transfer about 10-15% of the trailer’s tongue weight to the front axle of your tow vehicle. This stabilizes the whole rig. And don’t forget to check your tire pressure. Overinflated trailer tires act like basketballs, amplifying every bump. Drop them to around 35-40 psi for off-road, and you’ll feel the difference immediately.
Installation Tips and Common Mistakes
I’ve seen more than a few DIY builds go sideways. Here are the mistakes I see most often:
- Over-torquing U-bolts – This crushes the leaf spring bushings. Use a torque wrench and follow the spec, usually around 90-110 ft-lbs.
- Ignoring the shackle angle – The shackle should sit at about a 45-degree angle when the trailer is loaded. If it’s vertical, the spring can’t flex.
- Mismatched shock valving – A shock meant for a 4,000-pound truck won’t work on a 2,000-pound trailer. You need shocks valved for the unsprung weight of the axle and wheel assembly.
- Forgetting about brake lines – When you lift the trailer, the brake lines need slack. Otherwise, they’ll stretch and crack.
And one more thing—grease your pivot points regularly. A dry shackle bolt will wear out in no time, creating play and clunking sounds that drive you nuts.
So, What Does It Cost?
Let’s talk numbers, because this stuff isn’t cheap. A basic upgrade—new leaf springs, shocks, and hardware—will run you anywhere from $800 to $1,500 if you do the labor yourself. Add a new axle and hubs, and you’re looking at $2,500 or more. Full custom setups with trailing arms and remote-reservoir shocks? That’s easily $4,000 to $6,000. But compare that to the cost of a damaged trailer frame, a blown tire at 60 mph, or a trip cut short by a failed suspension component. Suddenly, the price seems reasonable.
Here’s a rough breakdown for planning purposes:
| Component | Average Cost (Parts Only) | Difficulty |
|---|---|---|
| Leaf Springs (pair, heavy-duty) | $150 – $300 | Easy |
| Shocks (pair, remote-reservoir) | $400 – $800 | Moderate |
| Trailing Arms & Brackets | $300 – $600 | Hard |
| Axle Upgrade (5,200 lb) | $500 – $900 | Hard |
| Misc. Hardware, Bushings, Brake Lines | $100 – $200 | Easy |
That’s not including labor, which can double the cost if you’re not handy with a welder. But honestly, the peace of mind is worth it.
Testing Your Setup Before the Big Trip
Don’t just bolt it all on and head to the trail. Take a weekend to test. Load the trailer to its real weight—water tanks full, gear in place. Then drive over some speed bumps at 15 mph. Listen for clunks. Watch the trailer in your rearview mirror—does it settle quickly after a bump, or does it continue to oscillate? Adjust the shock damping if you can. Then, find a gravel road and gradually increase speed. The trailer should track straight behind you, no sway, no bouncing. If it still porpoises, you might need to adjust the hitch weight distribution or add a steering damper to the trailer tongue.
Another tip—check your wheel alignment. A trailer with a slight toe-in will scrub tires and cause vibration that feels like a suspension problem. Get a simple alignment tool or take it to a shop that handles trailers.
Final Thoughts on Heavy-Duty Suspension
Upgrading your trailer’s suspension isn’t just about comfort—though that’s a huge part of it. It’s about protecting your investment. A trailer that bounces and jars is a trailer that’s slowly tearing itself apart. Cracks form at weld points. Bolts loosen. The frame twists. And all that movement translates to fatigue on your tow